Right before the hectic holiday season, before everyone got way too busy, I invited some friends over for a fun, relaxing Girls Craft Night. We all needed some time to catch up and steel ourselves for the coming season.
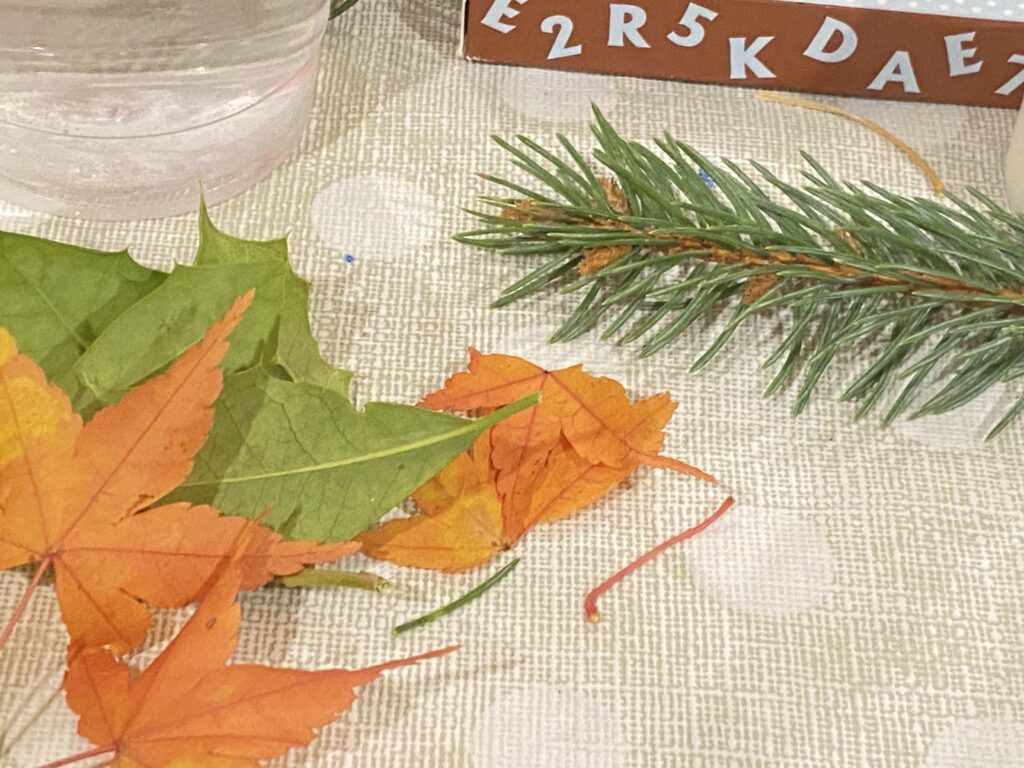
As I was planning out the craft, I thought of ways to use supplies I already had on hand. Let’s face it, I had 3 kids to buy Christmas gifts for! I already had a lot of polymer clay and tools from my previous clay jewelry class, so that part was a no-brainer. I also wanted to incorporate the essence of the season so ornaments were an easy choice. Finally, to celebrate the outdoors a bit I collected leaves and branches to make impressions in the clay. Some ladies even brought their own natural elements with them! We used things like pine needles and leaves.
First, before my guests arrived, I pre-rolled out several slabs of white polymer clay to save on time. Using a pasta roller is a godsend if you’re working with a lot of clay. It conditions and rolls it out at the same time. If you want to make this step part of your Craft Night process, you can condition the clay by hand and roll it with a rolling pin, glass bottle, or basically any long, smooth, cylindrical item you have in your house.
TIP: When hand rolling, you can use some clay thickness guides to ensure a consistent thickness. You can buy guides or better yet, make your own by stacking and gluing popsicle sticks or playing cards together. If you’re a free spirit, just eyeball it the best you can so the clay is approximately 1/8″ thickness throughout your slab.

I set up a table in my living room with a silicone non-stick mat at each station. The mats prevent the clay from sticking so they’re easy to transfer onto the baking tray. TIP: An alternative to the mat would be parchment paper or freezer paper.
I placed festive shaped cookie cutters, acrylic paint, alcohol ink, paint brushes, and miscellaneous tools down the center of the table so everyone could reach. Not only does this arrangement allow for elbow room, but it leaves space at each station for snacks and beverages – a must have at every Craft Night!
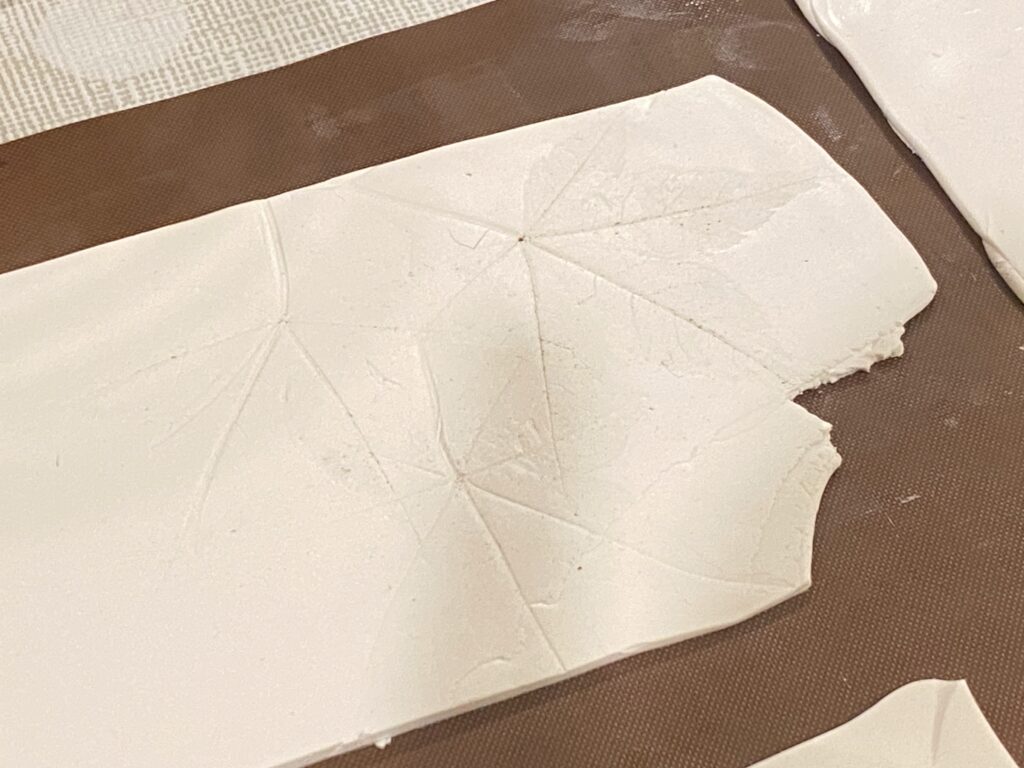
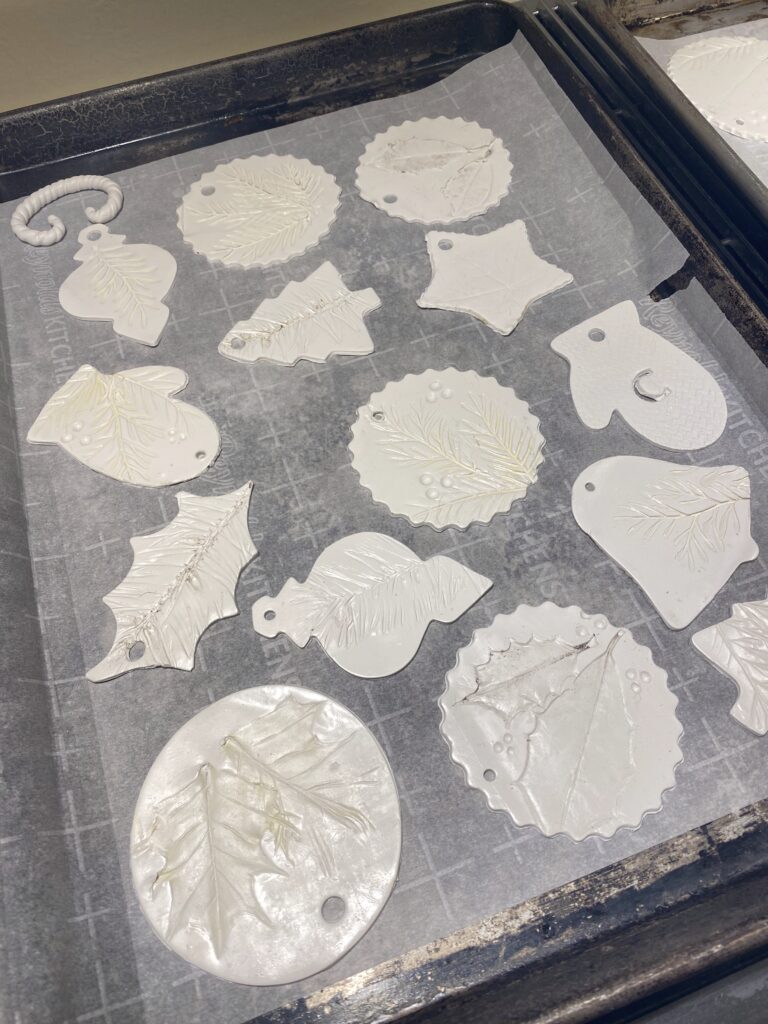
Since I pre-rolled the clay and cut them into rectangular slabs, we got right to work (after snacks Round 1) choosing which natural elements to use. My favorite was a bright orange leaf that I snagged from a parking lot near my daughter’s softball facility.
TIP: It’s best to make your impressions before cutting out the ornament shapes. This allows you to align the cutter to capture the best parts of your impressions. Not to mention, you’ll get cleaner, crisper ornament edges if you do it this way.
While everyone was making their imprints, I preheated the oven according to the directions on the clay package. That is, after I dug the wrapper out of the trash to read said directions. I also lined two cookie sheets with parchment paper. Once everyone was satisfied with their nature imprints, we were all ready to cut out our favorite ornament shapes! I used my metal cookie cutters because I had lots of festive shapes like Christmas trees, a mitten, and holly leaf. Then, we used a small circle cutter to make the holes that a string or hanger would go through.
TIP: An alternative to cookie cutters would be a simple drinking glass to cut a round shape and a straw could be used to cut out the little hole.
Each ornament was then carefully placed onto the baking pans lined with parchment and the pans were placed into the oven to bake. I set a timer on my phone according to the instructions on the clay package. If you’re anything like me, setting two timers might be a good idea because inevitably I will get distracted, leave the room, and not hear the timer! There’s nothing worse than working hard on a clay craft then burning it in the oven. Ask me how I know. I think this is pretty much a rite of passage for any clay crafter, so I know I’m not alone. After baking, let the ornaments cool down. This was the perfect time to refresh our drinks and Round 2 of snacks!
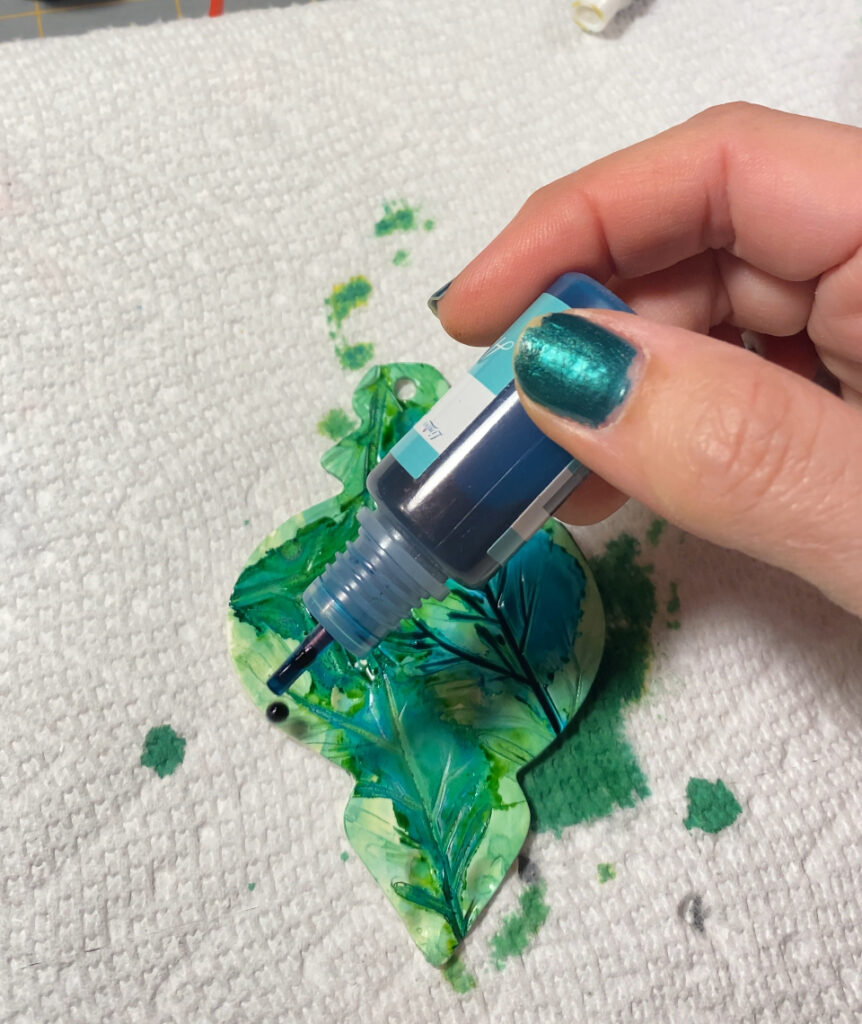
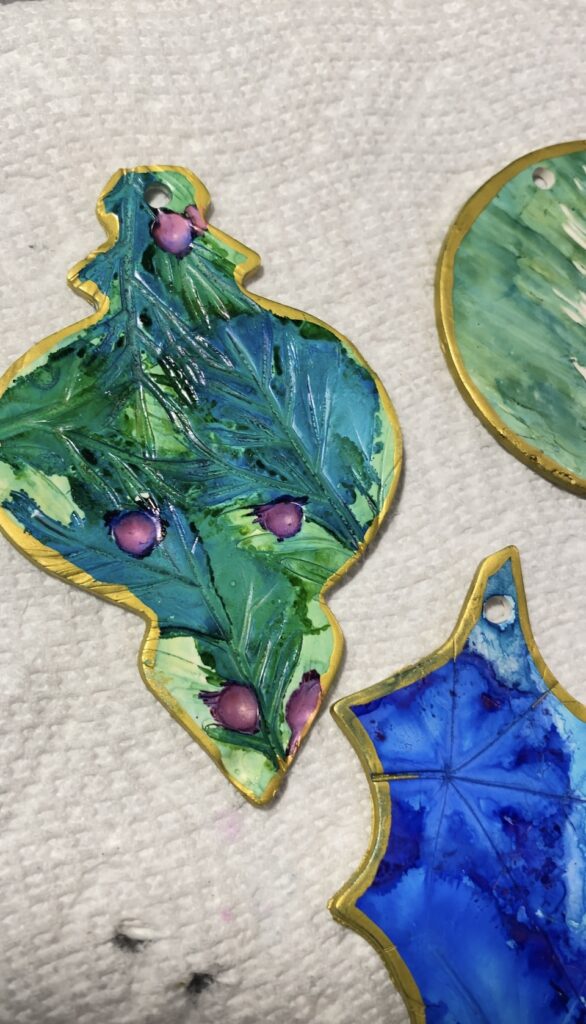
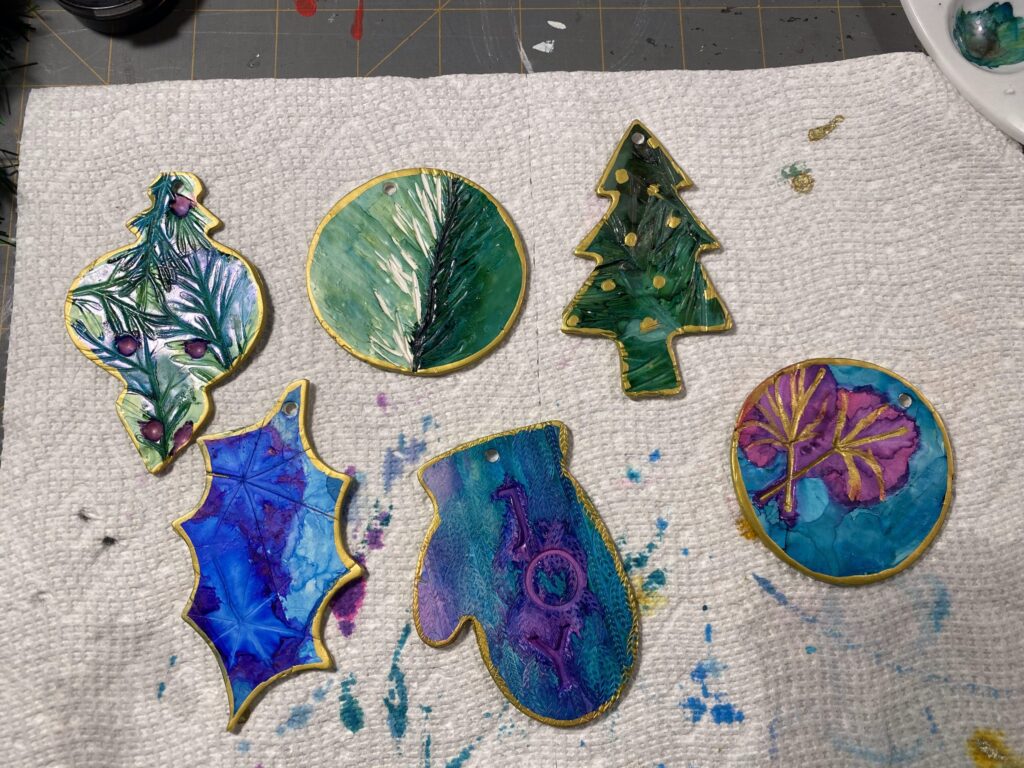
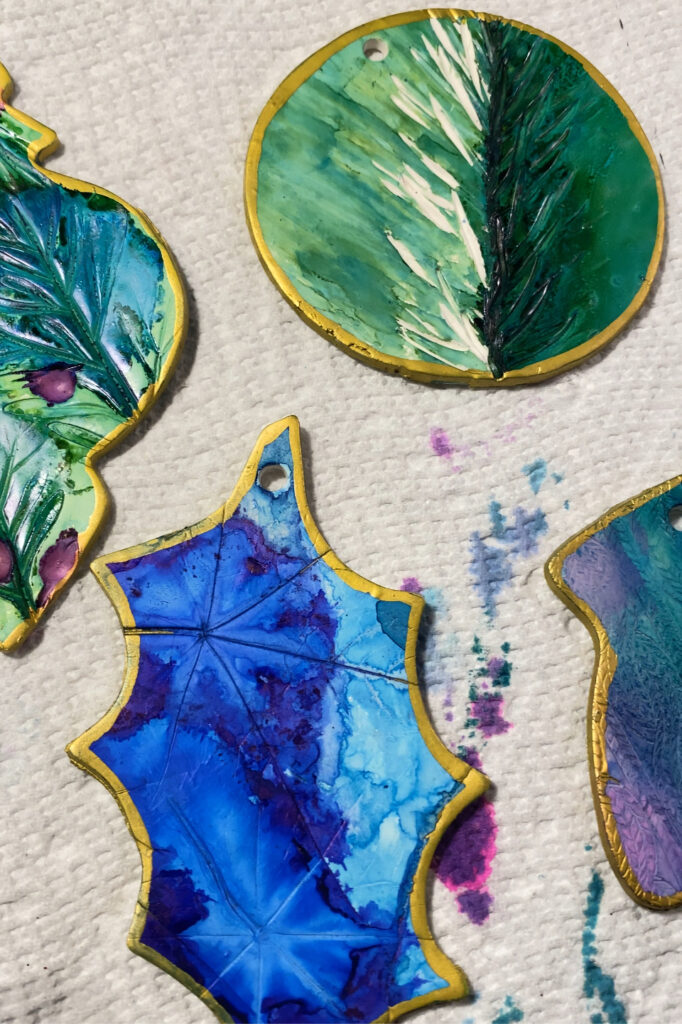
Finally, we went back to the table where we experimented with different mediums and techniques. Some painted their ornaments with acrylic paint and others used alcohol ink. Others used a combination of the two. This portion of the craft night had no strict rules and I reminded everyone of my philosophy to just have fun and play! I decided to use some alcohol inks for the first time and it was so fun watching the drops of ink slowly make their way into all the grooves and patterns of the leaf impressions. After that dried, I edged my ornaments with a gold paint marker for a special touch.
I hope you enjoyed learning how to make these nature imprinted ornaments. Drop a comment or question below! I’d love to hear what you think!
As Always, Stay Cozy!
Mandy
Tools & Supplies
- polymer clay (white)
- rolling pin or long smooth cylindrical item like a glass bottle
- parchment paper or freezer paper
- cookie cutters in various shapes or a simple drinking glass
- natural elements like leaves, pine needles, bark
- paint brushes
- acrylic paint
- alcohol ink
- baking pan
Step by Step Instructions
- Step 1: PREP CLAY Condition a ball of clay (about the size of a large egg) by repeatedly balling it up and rolling it around in your hands. Squishing it, rolling it into a ball, then squishing it again. The warmth of your hands will make the clay soft and easier to roll out. Once the clay feels nice and flexible, roll it out to an even slab about 1/8″ thick. Using a silicone mat or parchment paper underneath helps!
- Step 2: IMPRINT Lay natural elements onto the slab & gently* roll over them to get a good impression. Use more than one element if you like. Or go simple and use only one. *if you press too hard, your ornament will be too thin and may be susceptible to burning when baking…just like a cookie!
- Step 3: CUT Cut your shape and hole. Use a cookie cutter in any shape you like to cut out your ornament shape. Depending on the size of your slab, you might be able to cut multiple ornaments out of one slab! Don’t forget to make a hole for hanging.
- Step 5: BAKE Bake the ornaments on a cookie sheet lined with a piece of parchment paper according to the directions on the clay package. Set a timer and for goodness sake DO NOT get distracted! Ask me how I know.
- Step 6: DECORATE Let the ornaments cool down, then decorate them by painting them with acrylic paint or alcohol ink.
- Optional Step 7: SEAL Seal your decorated ornaments with a coat of liquid clay and bake it for an additional 10 or so minutes or seal them with a coat of mod podge, but do not bake again.